All Tied Up in the Neck Tie Top

I love the poet sleeves

Winter Wear Designs has some great patterns. Most are for woven fabric, but more are now designed for knit fabric. The Neck Tie Top is a simple knit blouse with an offset tie neck. This basic top has extended sizing from US sizes 00-30, and some awesome sleeves, and that is what attracted me. There are three, yes THREE! sleeve types. A stovepipe sleeve, a poet sleeve and a bishop sleeve. Honestly, I like them all but the poet sleeve is my favourite. It has that flowy, romantic feel that I love.

Previously the sleeves and the top were released separately as part of the 12 Days of Christmas (freebie) patterns. This happens every Christmas, so if you’re interested in picking up some free patterns join the WWD FaceBook Group. The individual patterns have been retired but released as one new pattern and part of the Winter Wear Designs Wardrobe Builders pattern group; they retail at US $5. As a new release it is on sale here October 7 -13 for US $3.
Bishop Sleeves are lovely and snug for winter, and they don’t drape into your food!

I am not a fan of high necks; it’s just personal preference. That said, I was up for a challenge to see if I’d like a tie neck any more than I did in the 1980’s. I didn’t; not on me, anyway. But, this being a blog tour we can be creative with the pattern. I decided to have a play and here’s what evolved.

I have a large bust, so I followed the pattern link and inserted a Full Bust Adjustment (FBA) for a knitted top. It worked really well. The pattern fits better in the bodice and doesn’t drag into the armsyce. Note – I always add length to my WWD patterns to account for my height.

Left is with FBA: Right is the original pattern piece

The sand coloured top was my muslin. The original tie was too heavy and pulled the fabric. I replaced it with white lace, which is more flattering and lighter weight. It fit so well I kept it, and if I am honest I love the poet sleeves! With all the trying on and off my front neck line had ‘grown’ by 1.5″, so I stay stitched the necklines on my final pieces for stability.

When it all goes to pot at least my dress is fabulous!

Onwards and upwards … For my final I pulled some lush double brushed polyester (DBP) from my stash. It is so soft and lovely I smiled the whole time I was sewing. For this item I made some changes … I dropped the neckline 6″ down from the centre front to make a V neck dress. I moved the bow to the apex of the V. As this is a winter outfit I like how there is a definite V, but it’s higher. This ended up with a neckline of 30″, not 20″. That is significant because my maths messed up first time and my tie could be 10″ longer. Even with 55″ wide fabric I’d have been better cutting 2 pieces and joining them at the centre back neck.

I love the high V neck with the bow at the apex

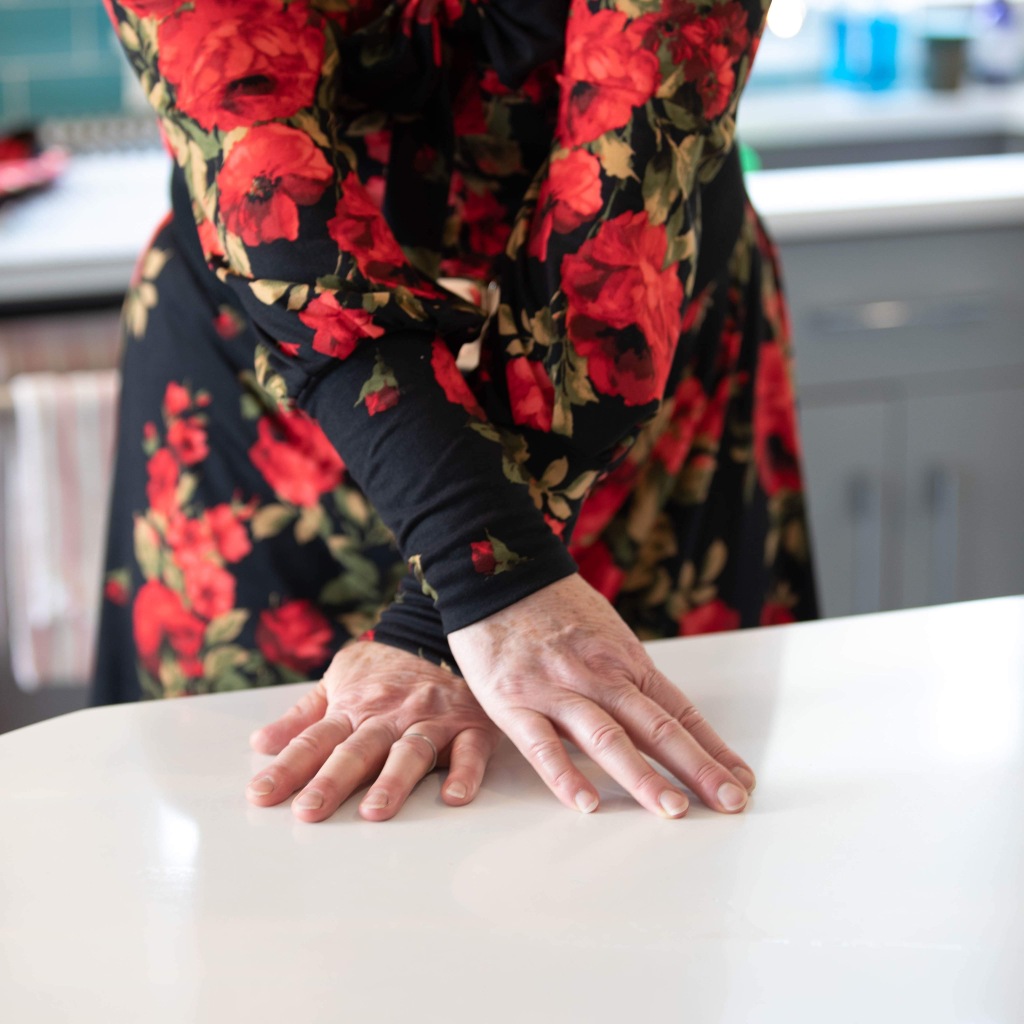
I also decided to go all out and make this a dress, and because I could, I made a matching mask. It’s fantastic working with Suzanne Winter, the designer, as she encourages me to hack patterns to create my own look. I measured down to my knee length, then graded the pattern out to create an A line skirt. The bottom hem circumference ended up at about 55″, basically the width of the fabric. I finished the hem with my serger, then sewed a narrow double folded hem. I feel that a knee length dress is more likely to show the inside of the hem when sitting, and as my mother would say “if it’s worth sewing, it’s worth finishing well”. It is very pretty. My husband’s eyes lit up when he saw it – SCORE!

Ready to cook, dressed in comfort

My friend, Ann Marie, from AMA Images took the lovely mad, COVID apocalypse photos. We went from demure pre-dinner prep with a martini, to madness in my kitchen. I hope you enjoy the outcome!

Don’t miss any of our bloggers deeper looks into the Neck Tie Top!
 
Wednesday:
 
Thursday 10/8
 
Friday 10/9
 
Monday 10/12
Aurelie of Maglice&So (found on the WWDF FB page
 
Tuesday 10/13
Donnisha guest posting at Winter Wear Designs

Layering Up for Fall

74423642_10221296265736100_1660767405577601024_oI love my Trendy Tanks. They can be made casual, smart, or sewn as swim tops. As long as the fabric has some stretch I have made them work for me. In winter I want tops that cover my shoulders, so when Winter Wear Designs (WWD) released the ‘sleeves pack’ I was pretty excited. Except I didn’t want a long or flowy sleeve, just something to keep my shoulders warm and stop the upper arms from glaring white everywhere. The sleeves pack did give me inspiration though. Maybe my Trendy Tank could be a Trendy Tee? IMG_5164.jpeg

As the Trendy Tank isn’t one of the recommended patterns to add the sleeves too, I looked at my other WWD tops to see if any had a similar armsyce; in both shape and size. Fortunately the Omega was on the top of my sewing patterns, and  I thought I could make it work. I knew I wanted the sleeve to be tee-shirt sleeve length. I compared the armsyce to the Omega and it needed a few alterations to make it fit.  All I had to do was fold over the ‘flutter’ ends. I  invariably stabilize my shoulder seams with clear elastic or ribbon and used ribbon as my cotton lycra would need ironing; plastic on an iron isn’t a good look! I also added chest darts because I have a DD bust. For extra contrast I cut the back in two pieces. It isn’t anything remarkable, just a centre back seam for visual interest.

I added a 2” inside sleeve and straightened the fluttery bottom hem. Then, feeling brave, I cut 2 out and sewed them in place. I must admit I was pretty pleased with the result! It fits well and I now feel confident at making the sleeves longer to above elbow length. I find this length is perfect because they stay out of the way when I sew, and hold their place without riding up my arms when I put a sweater on.


Feeling quite accomplished I moved on to the Twin Peaks Cardigan. My goal was for a modern twist on a traditional twin set. Despite the photos being of me in leggings (and pearls), the goal for this set is to wear it with a skirt. I didn’t have any cotton lycra left so sewed the cardigan in a lovely French Terry that has been around for a while and the colours almost matched. This pattern comes together quickly and easily and the instructions are easy to follow.

I added a lace overlay to the back yoke and made the sleeves from the same lace. The collar is slightly too big and I debated on adding buttons, but Himself said he liked it without and I was saved sewing 6 button holes. Phew! To give it more of a traditional twinset cardigan feel I added 1” to each centre front, and straightened the neck curve to a straight line. Sadly I forgot to baste the neck edge to stop it stretching and ended up putting some little pin pleats in the front. I like the added interest. The bottom hem has lace, again for visual interest and to lift a subtle red fabric into something a bit more fun. 

All in all I’m pleased with the results and can wear the items together or separately until Spring. I’m looking forward to replacing some of my longer cardigans with some Twin Peaks cardigans. While I made the straight back yoke the pattern also has a diamond shaped one. 

I hope you enjoyed reading about the good and amusing parts of my sewing. 

Do check out what others have created this week and remember that all jackets and sweaters have 20% off until November 3, 2019 on the Winter Wear Designs website.

HTML:

Don’t miss any of the stops along the tour:
10/28
10/29
Laura Hinze of Custom Made By Laura
10/30
10/31
Patricia of Sew Far North
11/1
Livia of Liviality
Laurie Roberts of The Bear and the Pea Atelier


Beach Combing – my Summer Style

What do you wear in the heat of summer allowing for a coastal breeze? If you’re me, you get on board the Winter Wear Designs (WWD) summer Style blog tour and create something comfortable and cool. Earlier this week I explained how I used a capsule wardrobe concept to make a summer wardrobe – then forgot to pack it for my vacation. I’ve been living in my bikinis, 2 pairs of shorts and 2 tanks all week!

I’ve been beach combing my entire life. Growing up on the South coast of England means you’re never far from the sea or a river. I have a collection of rocks that I use as pattern weights, and they’re all labelled with their places of origin. As such, it wasn’t hard to think of inspiration for my Beach Combing post. A big hat offering shade, some comfy stretchy long shorts and a loose top. Maybe add a cardi for those windy days.

To put my vision into reality I chose three WWD patterns, the Twin Peaks cardigan, Aviator knee length shorts and the Journey top (and a cheap black tank I already owned). I am not sure anyone will really recognize any of the items as, being true to the spirit of this tour I have hacked the heck out of them.

For my cropped Twin Peaks cardigan I started with a lovely soft grey cotton jersey. It probably has lycra in it but has been in my stash for a while and I am pretty hopeless at remembering fabric contents once they’re washed. I wasn’t well in April and craved a bed jacket. You know, the type they wore in the 50’s and 60’s? Well, a friend of mine offered to make me one if I gave her the pattern. It took all my energy to prepare the pattern and write some instructions as this lady lives rurally and doesn’t have the internet. I measured my side underarm to ileac crest (top of the hip bone) for length, cropped the sleeves to just below elbow length, and left off the front band. It actually took about 1m of fabric for an XL. I like that its multi-functional and I can wear it both as a bed jacket and as a cropped cardigan.

Following on from my Capsule theme I thought I’d make some knee length shorts to wear with my cardi; after all I had spare fabric! I do like the Aviator pattern. It has a ton of options including knee length shorts with a knit hem band, which stops them riding up above my knee. I also like a pop of colour, so added a coordinating pocket. I also love that WWD is gradually converting her PDF patterns into projector patterns. … more space for fabric!

Now for something cool and airy to finish off my outfit. I chose a shot burgundy Jason Yenter quilting cotton. Yenter fabric is soft, almost … not silk like … but much finer than cotton. I love the softness and how it moves with me. Well, before you go any further, let me say that the outfit Alyssa (from the Sewing Goatherd) made with the Journey dress / top as a base was a lot less stressful or difficult than mine.

I thought the Journey top would make a great summer breezy top. I used the flutter sleeves to make shoulder wide straps, cut eight of them, then sewed them in pairs to have 4 long straps to tie. Note – the straps are at least 2″ wide, which doesn’t make for pretty bows! I cut the bodice at its ‘with gathers’ size – both front and back. I trimmed the top yoke bands roughly 2″ (finished) height to fit at my underarms – creativity at its finest! Sadly, I needed to add some volume (thanks hips) in the back, but you can’t see that! It wasn’t as easy as my vision thought. I measured the length in my side from armpit to mid hip (where I wanted it to finish). This gave a flattering breezy silhouette. The original Journey pattern has different yoke heights under the armsyce on each side and it took some creative sewing to end up with my final result. I love it! I also have no idea just how much I altered it to end up with the Love Factor!!! Yep, just follow Alyssa’s lead … really. Unless you are a masochist!

… and that folks, is my Beach combing outfit.

Summer Style – The ‘Capsule Wardrobe’ with Winter Wear Designs

The Winter Wear Designs (WWD) summer blog tour is always fun. It gives me the chance to prioritise my sewing. The Summer Style theme allows me to add my own unique perspective on the WWD patterns.  

My son bought me a subscription to Threads Magazine. Last issue had an inspiring article on a capsule wardrobe. Four pieces: an upper outer layer, two bottoms and a top. The parameters were for the upper and bottoms to be the same colour, with the top adding a pop of colour. I’ve wanted to make a capsule wardrobe for a while, and summer seemed the ideal time as it means I’d pack less when going away. You think? I decided to give it a go, with many misgivings as I love colour! 

My capsule would be:

Outer top layer – The Twin Peaks Cardigan

Bottom layers – The Endless Summer Shorts (ESS) and The Sporty Skirt

Tops – The Omega and Classic Shift as a top 

I have made the Twin Peaks Cardigan several times. This time I wanted it to skim my hips, so redrew the pattern line from my waist downwards. I always add length and am quite pleased with the result. I taped the back yoke to the lower pattern piece and cut the back on the fold, resulting in a one piece back. My sleeves are ¾ length, partly because I like them that way, but also because I didn’t have a lot of fabric. I added an FBA, which means I must be careful where the front bands sit; they are cut on a curve over the bust. I am not sure I will do this in future as I like to throw on a cardi and go. I just wish it had pockets, so may add big patch pockets to the front … soon!

I love The Endless Summer Shorts (ESS). I’ve made many pairs, worn them to death and repeat … This time they are from the same lovely knit as the Twin Peaks Cardi. Despite liking the green, I felt it was too plain so added a pop of colour to the pocket trim. I made them to be as long as I had fabric left; about a 5” inseam. Then I had to narrow the legs a little as they felt like bloomers without elastic! Adding a decorative stitch on the hems made me smile, even if no one else can see it! This pattern is really versatile! It can be made with stretch or woven, just ensure you add a tie or elastic in the waist, so they don’t fall down! 

My other bottom item is the Sporty Skirt, sewn in a coordinating Northcott Quilters cotton. I love, love, love this pattern. It is so flattering. The cotton doesn’t drape as well as rayon, but the fabric has a bit of stretch and would drive me barmy if I tried to quilt with it! The green fabric has a watery feel; it’s calming and coordinates so well with the Twin Peaks Jackety-Cardigan. I opted for a below knee, double scoop skirt, and totally muffed up the waistband grommets. They will need replacing at some stage, but work for now. Adding a drawstring also helps give more of an illusion of a waistline.    

My trusty old Omega top has a hacked neckline. It’s easy to do. Just draw your new neckline and and transfer it to the facing so you have the same alteration. I find it easier to draw my new neckline on the fold, so its symmetrical. What you can’t see is the huge heart shaped button on the back. It’s the little things that make me smile. 

I have (yet more) quilters cotton with a wee stretch in it. I decided this would make a lovely Classic Shift Top. I hadn’t made one and made this according to my upper bust with an FBA. It fits nicely and is very cool to wear in our summer heat. I added length, which you can’t see as I tucked it in, but it’s hip length with slightly curved sides. Using my projector for many of the WWD patterns makes life (and pattern storage) so much easier! 

Do follow along with other ideas for your (not to late to sew) summer wardrobe … you might see something you like! 

 Don’t miss out on any of the stops along the tour!!!

7/12

Patricia of Sew Far North

7/13

Alyssa of The Sewing Goat Herd

Suzanne of WWD

7/14

Rachel Reece of Violets and Jewels

Ilse of Sew Sew Ilse

7/15

Kristen Guest Posting at WWD

Alyssa of The Sewing Goat Herd

7/16

Laurie of The Bear and the Pea Atelier

Patricia of Sew Far North

Magnolia – A Dress for all Seasons

What can I make with a metre of fabric? Admittedly it’s 150cm wide, but nonetheless it’s still a metre of fabric – and I am no longer a size 10. I remember my mum telling me that she used to be a 34” hip and could make a skirt with a yard of fabric. Those were the days!  I bought this lovely stretchy, soft leopard print fabric with the intention of making some throw cushions. A pop of colour in my Art Deco themed lounge. Then, I got an absolute bargain on 10m of zebra print and hey ho, the leopard print sat in the cupboard. 

All dressed up and nowhere to go

Winter Wear Designs (WWD) has continued updating their clothing patterns with projector files. As such, the Magnolia Fit and Flare Top and Dress size range has been extended to a 00 – 30. Here’s the size chart to make it easier. Remember that WWD size range starts at that size, so make sure you fit yourself correctly. Depending what you choose to make you need upwards of a metre of fabric!

Winter Wear Designs Fun Magnolia Dress & Top Size Range

I am finally getting used to my projector. I always adjust patterns for my height and fortunately WWD has a set pattern block size, meaning I make the same adjustments regardless of the pattern. Last time I made the Magnolia I was smaller, so couldn’t use my pre-printed and made pattern. I blogged about it in 2019’s Sew Yourself Some Love Blog.  The top I made as my original muslin was so comfy I literally wore it to death.

At that time, I made a size 12 with a Full Bust Adjustment (FBA). This time I’m at the bottom of the size 14 size range. I was feeling a bit risky (or is that risqué?), so cut the 14 and ignored the part that says “if a DD or greater consider a FBA”. I am tall with a DD/F bust depending on the weather, the day… and thought I might get away with it.

The end result is that I should have made a size 12 front with a FBA, and a 14 back. The front armscye is slightly large and gapes. It’s not totally obvious unless you’re looking for it but is a problem I often encounter. I usually sew a little dart in to the front armscye to compensate. My lightbulb moment this time was I am a good enough seamstress to make the adjustments. In future … 

A not quite perfect V

Of course, there wasn’t enough fabric to cut the length I prefer, but the lightness of this fabric ensures a lovely summer mini when I have long tanned legs. Himself approves and frankly, that’s what matters as I like to see a smile on his face. I debated making it sleeveless, then remembered that would mean a totally different shape armscye, and I’d already cut the front and back. I am on a mission to sew my stash so pulled a lovely pale stretch lace. It is just wide enough for the cap sleeves, and bonus points as it has a decorative edge meaning no sleeve hems. I must admit to singing Steve Millar Band’s Abracadabra while adding the lace ‘silk and satin, leather and lace’. Leopard and lace maybe? 

I always make myself a V neck as I feel busty people look better in a V. More eye candy perhaps? That said, this time I fudged the V and believe me unpicking a lightning stitch from a lightweight knit fabric isn’t fun. As such, my V isn’t totally central; I have an idea of how to remedy it but there wasn’t time before photos.  

Pinning the V neck

I’ve been asked why I include my mistakes and bloopers. I do so people can see that we all make errors, despite our experience. Mistakes make us better at our craft, no matter what it is. In nursing we called it reflective practice. I might not be able to practice nursing now, but the tools I learned stand me in good stead. I love sewing and encourage people to sew and learn.

I used my roll hem foot to hem the bottom. I don’t use it often but really ought to as it gives a professional finish. The fabric was quite thick, but it worked without too many curses. It also made it easier to follow the curves at the vented sides. 

Currently we have a chilly weather system blowing through. I grabbed my treasured ancient Gamma Mink for warmth, and aded it to my velvet leggings and heels, and I felt camera worthy. 

The Magnolia is on for US$3 all this week. The link for the pattern is here. If you join the WWD FaceBook group you also have access to the files, which have all kinds of alterations and hacks, making the Magnolia a lovely year round staple. Follow Winter Wear Designs website for more interesting makes this week. 

Happy Sewing! 

Love, Love, Love ….

As is usual the time of year Suzanne Winter at Winter Wear Designs encourages us to Sew Ourselves Some Love. This year the lovely romantic month of February coincides with the release of the Y Back Sleep Set. Now, if you’d been following along, you’d know the set released a week ago and was on sale all last week. It comprises of a camisole, above knee sleep dress and shorts. Like all Winter Wear Designs patterns there are several options to allow you to put your own mark on this pattern … which is what I did.

A simple but effective construction

I also altered the pattern into a rather riské baby doll for a burlesque performance on February 13th. That, dear people is why I couldn’t post this little blog last week. I mean, Zoom is great for virtual shows but I really didn’t want to ruin the surprise.

Legs! Legs! Legs! The Boyz assisted with some modesty

So, I hear you ask … what did I do? I used my fancy smancy new projector, which it must be said still intimidates me, to trace out the pattern. I have to be quite organized as I always alter patterns to fit me. With a projector it entails moving the fabric around a bit to make sure I trace what I am supposed to. I am getting the hang of it tho’! My initial fabric has been in my stash for at least a decade. It’s soft and light (and a little sheer, hence the bikini underneath), and I intended it to be a short nightie, kind of a long camisole to cover my bum … Of course I didn’t make a muslin, and of course I should have! I’m at the bottom of the XL and should have made a large: But I didn’t, so I had to alter the pattern. My machine decided it didn’t like having a tension setting that fabric approved of – more delays. Then my serger really spat the fabric out after regurgitating it. Do you get the picture? It’s just as well I love my fabric!

It is a slimmer fit than the pattern but suits me just fine.

A wee while ago (pre-covid) I bought a tube turning do-hickey at the thrift store. It works perfectly; so I turned the straps into little tubes as I detest making bias. I also found some matching wide rickrack which I added to the bottom as a pretty addition to the hem. I make underwear so installing strap slides and O rings was a breeze. The instructions are clear for anyone who hasn’t tackled that before though.

PHEW! Let’s say Himself quite approves of the wee blue nightie. I also approve and think it could be day wear or night wear. Or in these weird times where I don’t go anywhere I can wear it all the time.

The Y back is actually much more comfortable than I thought!

Onwards and upwards … I’d intended wearing a corset for my burlesque routine but things being what they are, was uncomfortable and restricted. A wise friend said “why don’t you make a baby doll instead?” and off I went … I originally pulled the WWD Magnolia pattern as I have hacked that a lot, then thought ‘hang on, you have the Y back already on your cutting table’. It was a lightbulb moment!

I performed to ‘Skyfall’, an amazing song and my concept was 007 meets Mad Max. If we can have leather and lace I thought I’d mix camo and lace. If I am honest I didn’t actually have enough of either to make it from one fabric, but am thrilled with the result.

Its amazing how well the pattern shows from the projector. The grid lines are very useful!

On went the projector – again. I merged the front and back side seams. I could have taken out about 8″ of volume, but lace being the diaphanous fabric it is, volume was good. The projector allowed me to line the fabrics up to where I wanted, then I used tailors chalk to draw my sewing lines. This was important as I didn’t want to have huge seams and used camo for the front and back, and lace for the sides.

Performance ready with the original WWII gas mask and corset .. and my mask and baby doll!

For modesty’s sake I have closed the front a little more than I did for the show, and I am wearing some clothes underneath. This is, after all, a family blog! Instead of a Y back I made a halter neck from the power mesh selvage. To hold the whole thing together I used ‘quickie-clips’ which funnily enough do what the name implies, allowing for a quick exit. I am really pleased with how it has turned out. The back was quite loose, so I gathered the back and sides with more of the selvage resulting in a more fitted line.

Its comfortable and I expect I will make more baby dolls from this pattern
A simple gather across the back allowed for better coverage – and a straighter hem!

That was my little escapade in sewing myself some love. Especially at present its important to recognize that each and every one of us is worth loving and kindness. On that note I wish you all Happy Valentine’s Day, wherever you may be.

Thank you Suzanne Winter for the encouragement and accommodating my time lines.

Thanks also to my Husband, aka Himself, for his tolerance in me parading around for many days in a corset, nightie and baby doll. Such a trooper!

Summer Time Tee-se!

It’s summertime at long last, or so I am being told. I’m writing this in the middle of nowhere in the BC Interior (Canada). Mother Nature seems to still be playing around with us as the temperature has sunk from 29c to 24c to 15c today. Not the direction I wanted at all! Especially as I have been playing around with some Easy Breezy Summertime Trendy TeeDresses.

It started with my girlfriend, Lil Miss Rosie Bubbles, asking if I’d help her make a swinging triangle dress for an upcoming Gogo performance. “Of course”, I said, then put on my thinking cap … After a day or two pulling patterns I was told in no uncertain terms to, ‘STOP FAFFING!” and “why not use that nice tee-shirt as a base”. That nice tee-shirt is the Trendy Tee by Winter Wear Designs. I’ve made it several times before, with sleeves and without, and with a wider neckline. I live in the three of them currently!

Rosie Bubbles wanted a multi-purpose triangle dress that she could wear both on stage and off. She’d bought some lovely royal blue stretch velvet, and was performing a cheeky Gogo routine with some other dancers. Her dress needed to be big enough to have swing, AND a hula hoop installed in the hem – yes, you read that correctly.

Well, it seemed like easy enough maths. Just make the bodice fit, curve out the fabric to ‘swing’ flatteringly over her widest parts, and ensure it is big enough to (temporarily) install a hula hoop for the Gogo routine.

I pulled my Trendy Tee pattern out and redrew it onto tracing paper. I decided to make a muslin, because, even though its a simple pattern, I’m a totally different shape (and height), and velvet isn’t cheap. The resulting grey stripy muslin was pretty enough for me to finish, and I think it will look good with boots and a cardigan or jacket in fall.

I love V necklines. I think they flatter a busty woman better than a round or scoop neck. I also find using Best Press, or a spray starch invaluable when cutting and pressing a V neckline in place. It helps the narrow piece of fabric lay flat. Of course, putting my long sewing ruler over it until it has ‘set’ also helps. There is nothing nicer than a well shaped V neckline – and we all can sew one, if we know how. I also like to pin my neckline in place and topstitch it to prevent any of the seams rolling. I learned that one the hard way.

Onwards and upwards for Rosie’s blue dress. I decided I’d sew it for her because velvet sheds like teddybears in a barbershop, and I have a serger. Rosie took it away with her to sew in the hula hoop and the resulting dance routine is hilarious! Fortunately she owns some sparkly hot pants to maintain her modesty!

Rosie’s sewing has been coming along in leaps and bounds this past year or so. So much so, that she took the challenge to make herself a Canada Day Dress using the same pattern. The challenge here was that she bought a pretty red and white fabric – without stretch. The Trendy Tee is made for a stretch fabric. “No worries” she said, “we will manage”. Such faith …

As such, we chose to put the pattern on the grain of the fabric, but placed it 1.5″ away from the fold. This resulted in enough room for the dress to pop over her head and sit comfortably. I have it on good authority she will be wearing it to work on Canada Day.

Back to me … I decided that after making the muslin and being teased for faffing over its completion I’d make some more. Yes, I do think its worth finishing seams well, and being aware of my clothes construction. Enough said! If you take care in the making, the wearing will be easier.

When I met Himself (was it really almost 20 years ago, Laura?), I used to have three little summer dresses. They had shoestring straps and were fit and flare to mid/lower thigh. I lived in those dresses summer after summer. Then I hit my mid 40’s then 50’s and my shape changed. Making this Trendy Triangle Dress is a step into recreating that easy breezy ‘I’m going away for a few days, sunny weather guaranteed, and I just need a few little dresses’ feeling.

I have some lovely tee shirt fabric. It doesn’t stretch much and has candy and cakes all over it. I was concerned it would look like a nightie, but convinced myself that with a pair of Fluevogs, a sun hat and shawl I could carry it off as a summer dress. It looks and feels lovely to wear ands been through the wash twice in the last week. It also irons easily – a bonus!

My last fabric is a cotton lycra jersey fabric. It has about 20% stretch, and while I used to shy away from horizontal stripes, now I am in my 50’s my attitude is much more ‘If I like it, I will wear it’. I didn’t have quite enough of this fabric though, so decided to add a rear yoke in lace (as seen above). I didn’t want my bra straps to show, so decided I’d put in a netting underlay. That idea morphed into ‘but why wear a bra?’, and I drafted a built in bralet. It’s not perfect, but it holds the girls in place. One thing this Covid era has taught me is try to sweat less small stuff … and wearing a built in bra means less sweat! The saving I made on the fabric allowed me to (almost) pattern match the stripes while not wasting any fabric. Again, I paired it with a hat, heels, a wrap and a cute bag (I made that too). I feel I could go off to a summer garden party or informal wedding in this. Heck, in rural BC this would be for a smart wedding!

The good photos of me in my dresses are taken by my good friend AnnMarie. She is an amazing fashion photographer; as can be seen as she has brought out the good side of me! Her website is www.amaimagery.com

Note – I haven’t received any compensation for this blog. It’s my work (and yes, I did have Lil Miss Rosie Bubbles as my right hand woman). Rosie can be found on FaceBook if you want to see what she is up to.

Almost lastly, my Boyz, Mr Moose and EeyOre wanted to be in on the Canada Day action as well. As such, I made Moose some new shorts and EyeOre wanted his biker side brought out with a Canada Day waistcoat. His clothes were made using Himself’s old jeans and a duvet cover as lining. They both adore Miss Rosie, and EeyOre’s flag and Moose’s bandana are made from the leftovers of her dress fabric.


Lastly, do join along and read some of the other creations this week. Suzanne, the wonderful owner and designer of Winter Wear Designs has created a selection of patterns for $4 this week, through to July 5th. They can be found at The Summer Collection

 
Don’t miss out on any of these stops on our Summertime Blog Tour:
 
6/29
Patricia of Sew Far North
 
6/30
Lim of KekeSews
 
7/1
Debbie Groves Guest Posting at WWD
Diane of Sewing With D
 
7/2
Livia of Liviality
 
7/3
Aurelie of Maglice&So
Donnisha Jones Guest Posting at WWD
Ilse of Sew Sew Ilse

Sew Myself Some Love …

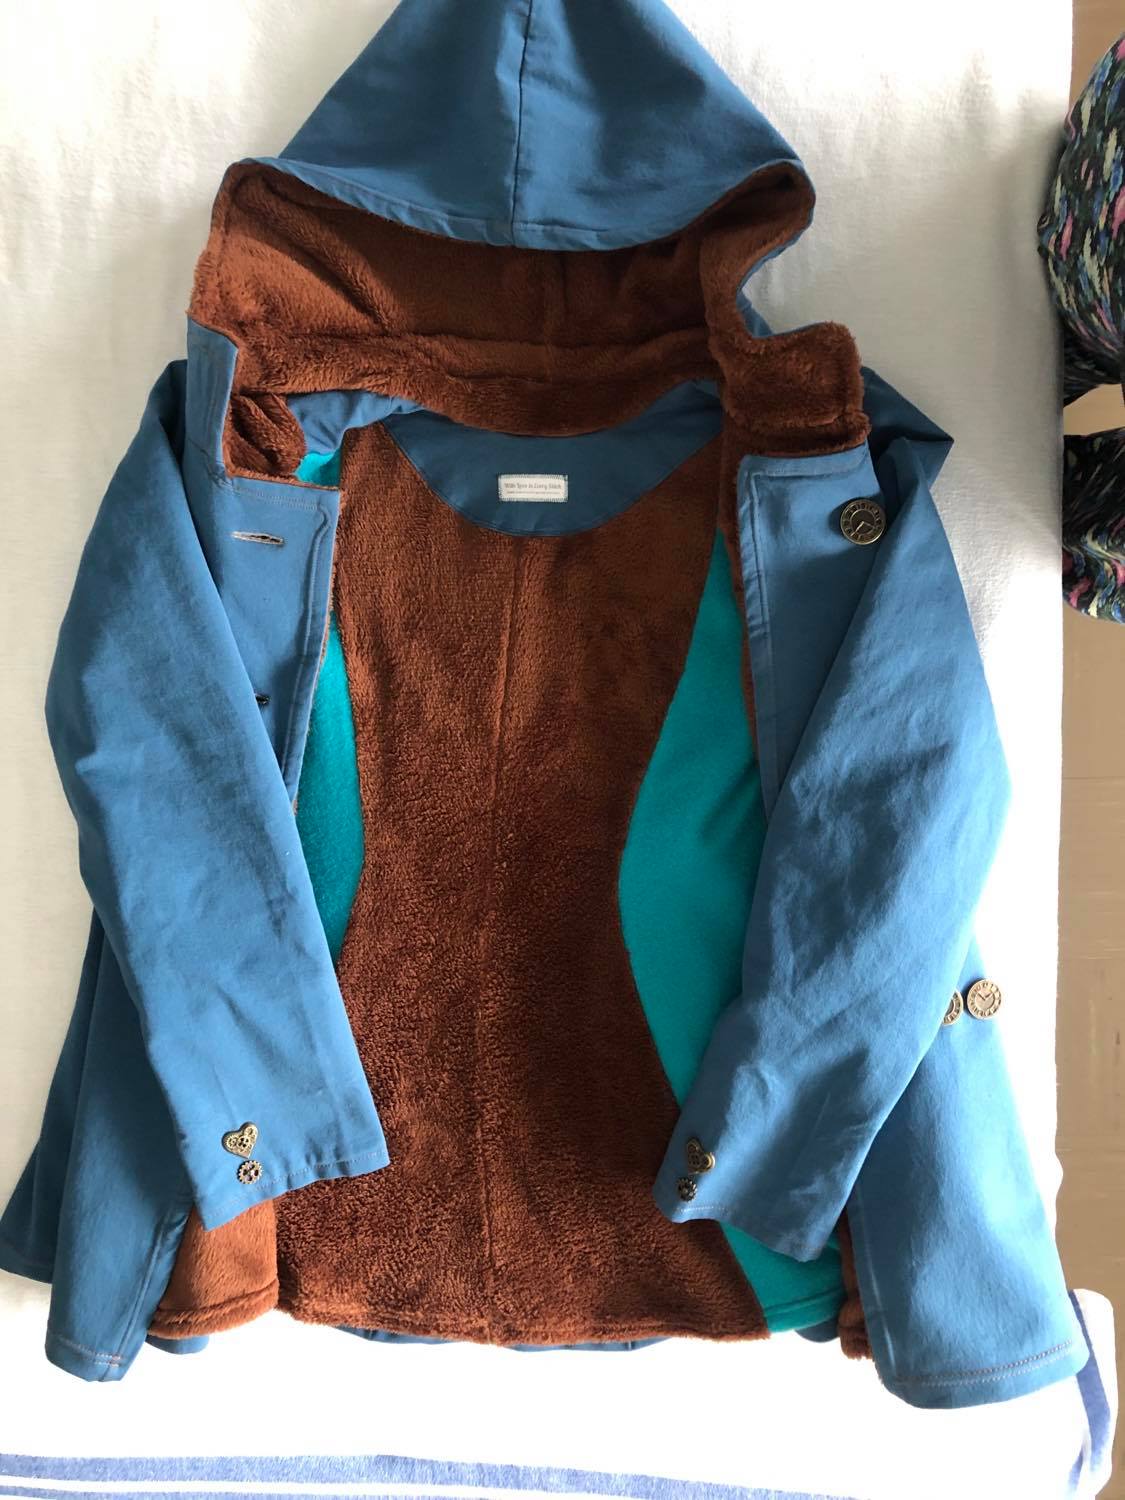
A few years ago I hosted a Sew A Long for the Provence Pea Coat. We lived on a ski hill and I had this idea for a warm snuggly coat to counter the elements. I was gifted some lovely fabric by Simply by Ti, but decided to use my stash for the lining. Most of the coat went together well, but like a twit I realized too late that the combination of three different fabric weights and stretches was disastrous! Ooh! and I’d interfaced the coat fronts as well, meaning the stretch was different even in the same fabric. 

84674269_10222363753062616_4905472312733597696_o.jpgIn a nutshell I’d used a stretch blue twill from Simply by Ti for the outer fabric, a chocolate brown less stretchy teddy bear fleece for the bulk of the lining, and turquoise stable fleece for the centre back and sleeve linings. You can see where this is going … 

Putting the lining and Main (outer) together is where it all went wrong … After I had sewn the coat lining and outer together it didn’t sit properly and gradually it stretched and stretched until it ended up like this …

At that point I put it on a shelf and walked away. I was gutted. I’d been gifted the fabric, but Canadian customs being what they are, I was charged the purchase price as import duty – so much for NAFTA (Free trade between USA and Canada). It made for some pretty expensive fabric! Then we moved … it went from shelf to box to bag and finally, when Himself hung me a hanging rail it was hung up … to stare at me balefully. Fast forward at least 3 years … my sewing skills and confidence have increased, and I have a new sewing machine. So here is what I did … 

IMG_6121
I love some good top stitching!

I’d made an integral hood. This was to be a winter jacket and my neck gets cold. What I hadn’t done initially was sew a couple of rows of stitches where the collar would be. This stopped the weight of the coat pulling the lining down. Already the coat hung better. 

I realized that there was no way I could unstretch the main fabric. It is what it is, and while I knew I’d messed up I really want this to work. I took a big breath, focused, then cut the bottom off. I hung it on Mimi (my mannequin) and walked away for the night. 

The next step was lining up the layers, keeping the main fabric longer than the lining. Rather than ‘paper bag’ the layers together I hemmed them individually. It’s not pretty but if the outer decides to stretch again it will be a much easier fix! 

87539977_2790339484387462_344144352060112896_n.jpg
All the pretty colours and stretches! 

I chose huge 2” buttons but my button hole function only goes to 1 3/8”. Here we go again… Despite having interfaced the front panels I decided to add some heat and bond between the front and lining, holding the layers together while I made the button holes. Being a bit quirky I bought a packet of Steampunk buttons with the intention of sewing them all over the jacket. I haven’t actually managed that yet (and I sewed the display buttons in the wrong place). Ah well, life’s been rough recently. 

Finally though, what I can say is that I have a lovely warm jacket (now that it’s the end of February), and holding onto that loving feeling is what kept me going … over 3 or more years. I apologize for the lack of a pressed coat, but it is so much fun to wear! 

88310434_3244628932231977_5930798791471923200_n.jpg

Note – No teddy bears were cut up for the lining, and EyeOre thinks it is just his colour! 

Here’s a list of the other contributors to encourage you to Sew Yourself Some Love

Sew Yourself Some Love Blog Tour
2/24
Suzanne  – Winter Wear Designs Fun
2/25
Round Up –  Winter Wear Designs Fun
2/26
2/27
2/28
Patricia of Sew Far North


It’s the Holidays!! Let’s Celebrate!

76907112_10221579075046156_2853883365919031296_o

I love celebrating and Christmas is one of my favourite times of the year. That all being said there are many other festivals celebrated around December, both religious or otherwise. The scope for this blog tour is anything holiday related, holiday styled … basically I want you to go away with a feel good factor of any kind, then hold on to that for the holiday season.

IMG_5386
This kind of says it all. Canadians are very welcoming

This is an early Holiday Blog Tour and I’m writing this exactly one month before Christmas Eve. I’d like to thank Suzanne Winter from Winter Wear Designs for getting my rear end into gear and having at least one Christmassy item in my closet! For once my garment is finished. My darling husband took photos at The Grand Hotel, Sun Peaks, BC. We lived in Sun Peaks for many years and it now has its own place on the world stage as the second largest ski resort in Canada. Its an amazing place … but I digress.

15941183_10210111611881650_8398188943508611420_n
Sun Peaks Resort in winter, one of my favourite places ever!

Having adapted the Twin Peaks Cardigan last blog I decided to make a proper one –  as in, don’t play around with the pattern Patricia!. That’s a bit of a challenge as I do like to put my own stamp on my clothes. Arghhhhh …. I did promise though, so here goes.

IMG_5384
I’m just holding the ornament … honest!

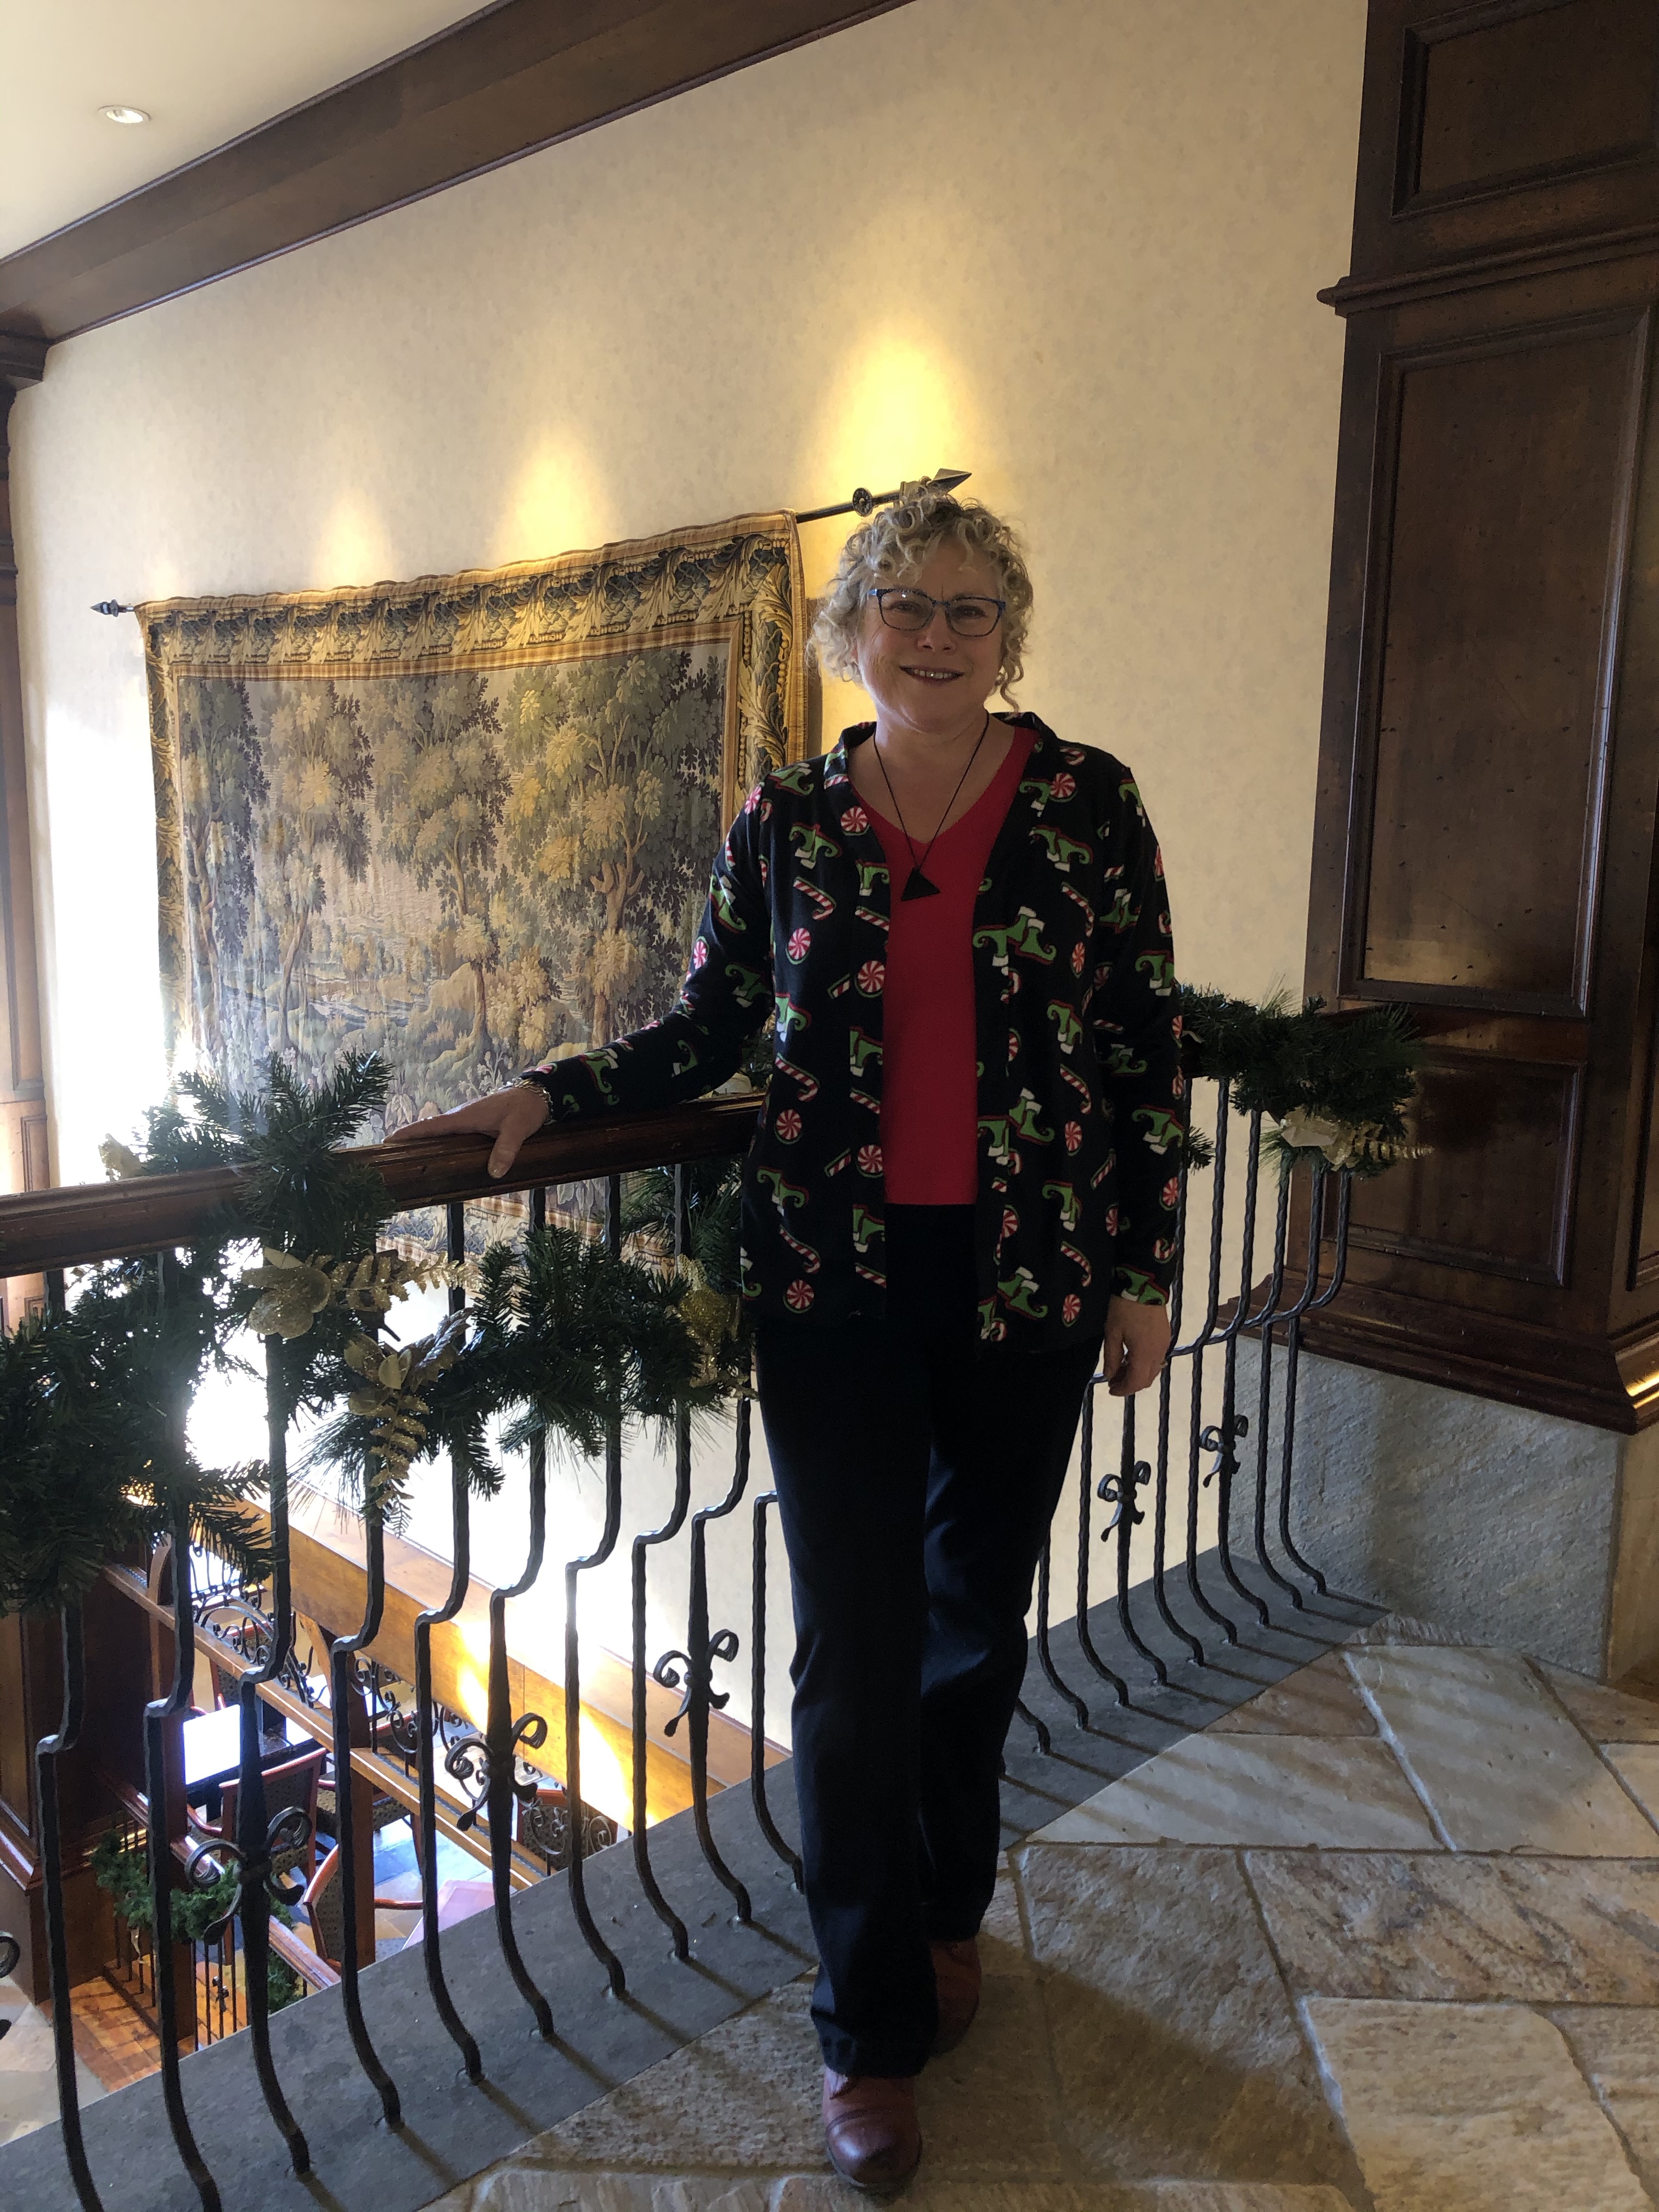
The Twin Peaks Cardi is an easily made project, even for those of us who sew slowly and tire easily. I chose not to use my Serger as he was loaded with white thread and this joyful winter fleecy fabric is black. So I loaded up my everyday workhorse Bernina with black thread and a ballpoint needle, and we were off. The pattern calls for fabric with 20% stretch and I loved the fabric so much I kind of forgot to test the stretch. As such my cardigan is a tad snug. If I knew someone just a touch smaller than me it’d be given away but currently I might be living in it. In fact a friend offered to take it off my hands if I made some booty shorts to go with it …. Hmmmmm …. I kind of like it now.

IMG_5373
With the spooky Carol Singing Family!

Every obstacle has a silver lining though as I think I could make this in a woven fabric by sizing up one size. I love how it skims my bust line and falls gently down to my upper hip. I cut the longest tunic length and didn’t add pockets – they always seem to get a bit static-y with fleece.  As for the not altering the pattern … I failed as I narrowed the hips and added a little vent at the bottom of each side seam. It just happened without any real thought … ho hum …

IMG_5381
Rear view with shirt tail hem

My intention had been to make this as a snuggly PJ over-top come (almost) dressing gown. I like little sleep shirts and last month Livia of Liviality showcased the Double Take Tank as a dress. I think I can make it into a mid-thigh sleep shirt. I would say watch this space, but I am sure you will find out about it if it happens. In the meantime I am wearing my little cardigan for all its worth. It’s lightweight but snug and cozy. All I need is a tee shirt or tank underneath. For the photos I wore my new cardigan with my adapted Trendy Tank that I made last month. That tee is one of my favourite items and I need more (and the energy to make them!).

IMG_5379
Yes, that is my halo

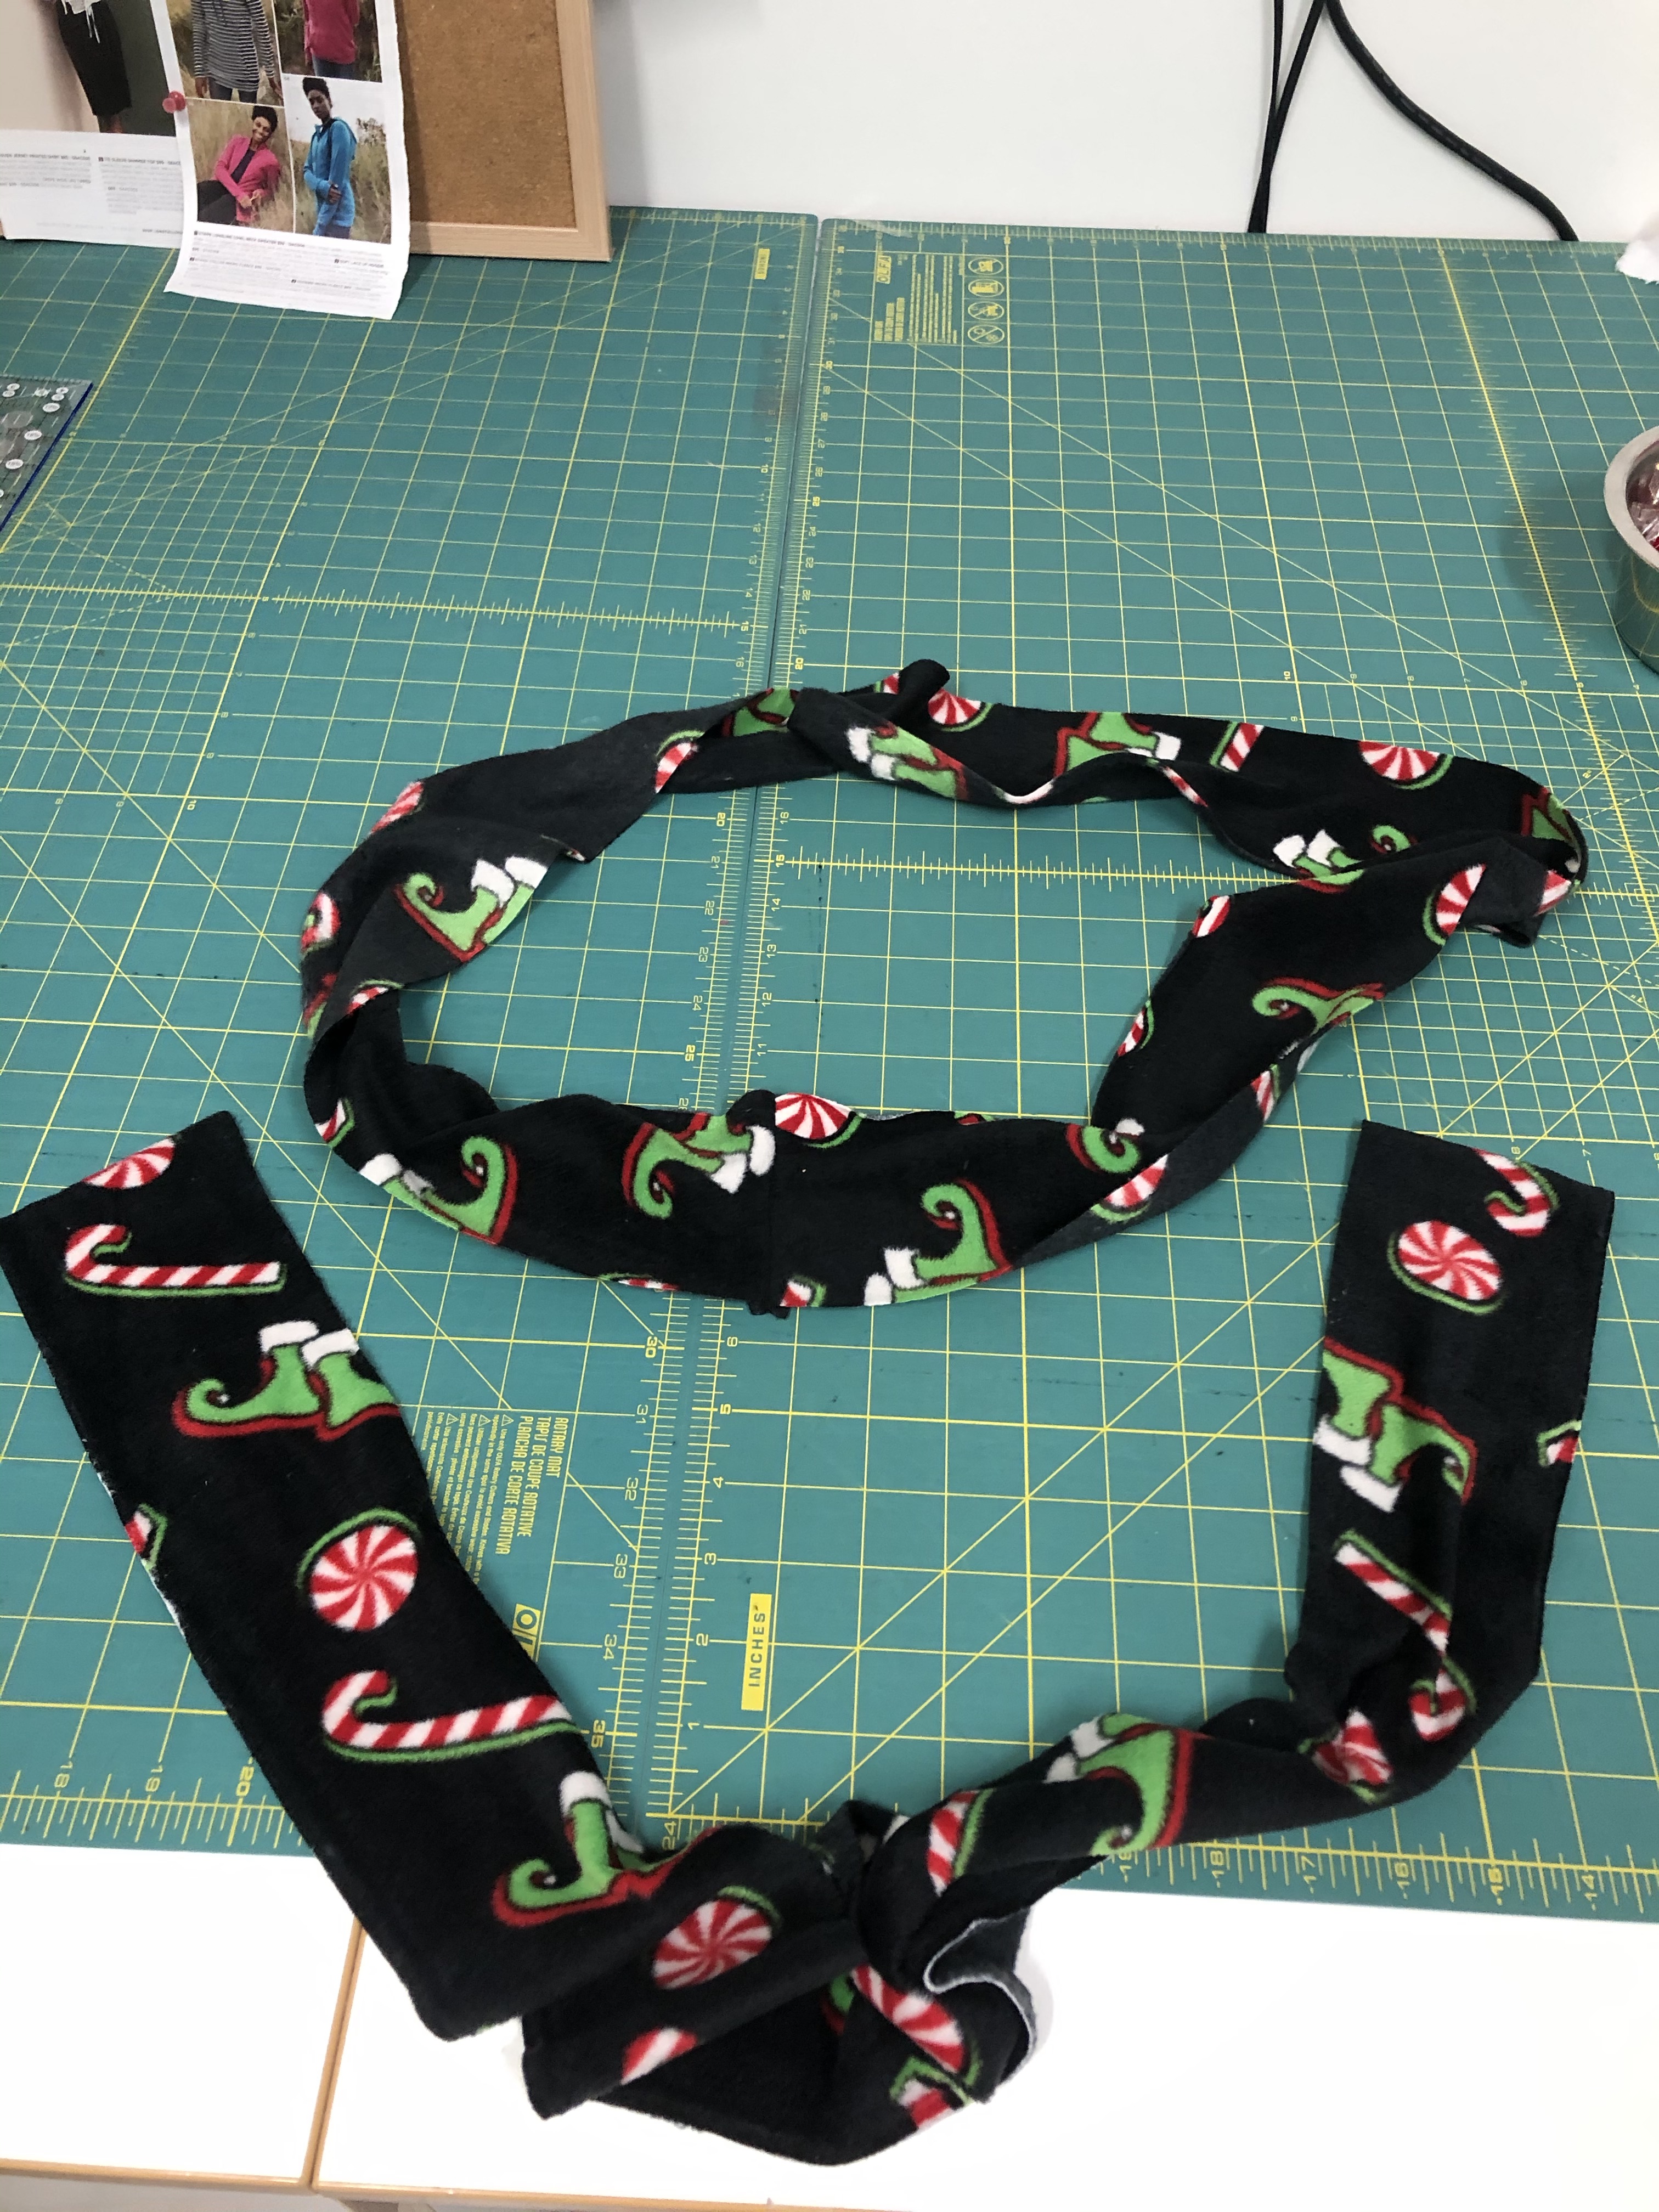
Bloopers along the way … When I was sewing my neck band pieces together I managed to sew a ring with one piece of fabric. Fortunately I had enough to just cut it off. Unpicking stitches from fleece is no mean trick!

IMG_5355
A cute, if wrong neck band!


Do read the other blogs and I hope you find some inspiration for your holiday sewing!

—————————-
Don’t miss out on any stops along the tour:
November 25
Suzanne of Winter Wear Designs
November 26
November 27
Alyssa of the Sewing Goat Herd
November 28
Patricia of Sew Far North
November 29
Livia of Liviality


Summertime …

Sing with me people …

“Summer time, and the living is easy,

Summer time, and the cotton is high …”

64741811_10220104539703694_5698332174747435008_o.jpg

For me, summer is all about cool, comfortable, (often cotton) clothes. Summer is hot, and I want loose clothes, but not look like I am wearing a paper bag; I guess I want my summer clothes to skim and flatter my body. 

I made this Refined Raglan from quilting cotton, though it feels (and creases) as though it has bamboo in it. I’d used most of the fabric on the back of a friend’s quilt and knew it was a rotter to work with as I had to cut it widthways and sew the 2 widths together to stop it warping. Even so, it is lovely and soft to the touch and I knew I wanted to make a little ‘something’ with it, even if it doesn’t drape well. 

Initially I planned the raglan sleeves from lace, but didn’t have anything the right colour. Somewhat magically though, I managed to cut this pattern out from very little fabric. I would let you know what alterations I made to the pattern, but all I wrote on it was ‘altered here and there to fit me’. Yep, that’s a bit ambiguous if somewhat correct. 

I last made the refined raglan in 2018 as a mid-thigh tunic after Suzanne Winter, the Winter Wear Designs designer, challenged us to knock off a current fashion piece.  I like my tunics and tops that go over leggings or skinny jeans to be thigh length, but if worn with skirts or shorts I prefer a shorter hip length top. I think it gives a better silhouette. This time I cut the fabric to the longest pattern size length, and feel its prefect for me. 

IMG_3723.jpegIt is loose and comfortable and I probably could have sized down a bit, except across the bust (as usual!). Summer has a habit of making me swell, though that could be the wine and food, so I decided to keep with the loose feel. It still flows nicely over a long skirt or shorts. There are no shorts photos as it has been pouring rain here. You just get frizzy hair instead!  IMG_3729.jpeg
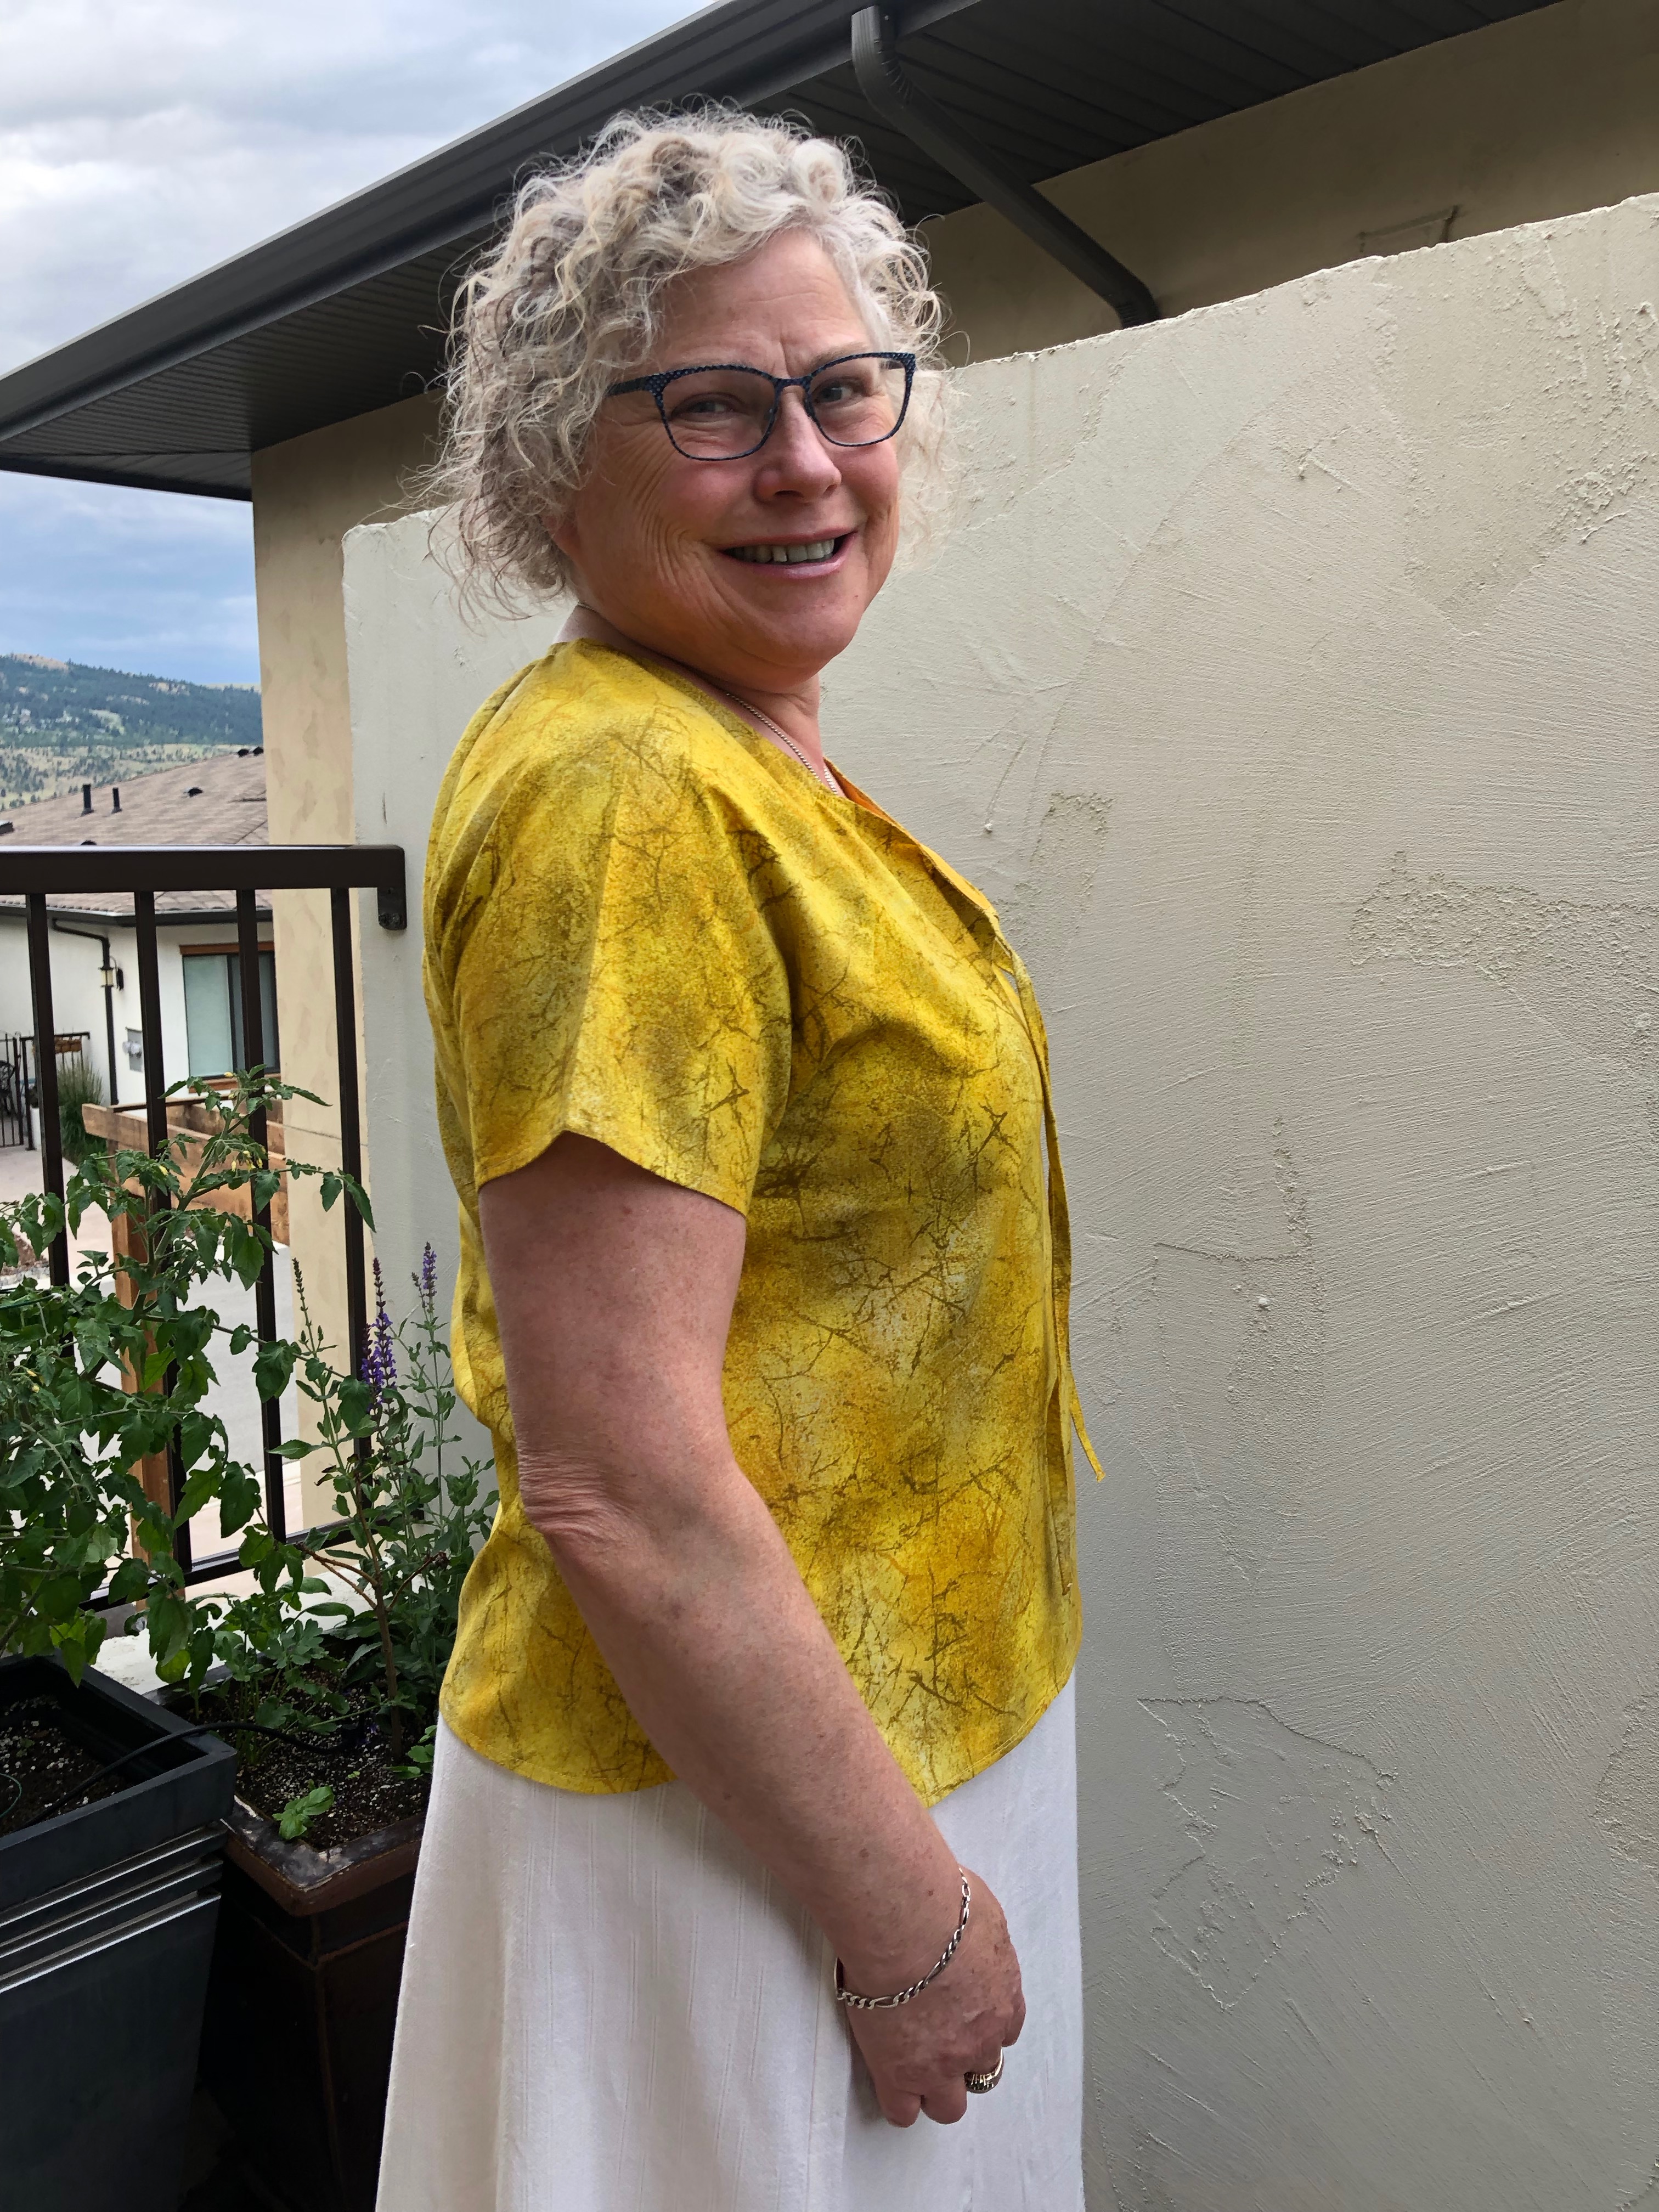
The instructions are easy to follow, and I added the notched neckline as I don’t feel round necks flatter large busts. Instead of making some single fold bias tape I used a gold grosgrain ribbon. It’s a nice, if somewhat loud feature. I feel the ‘less than perfect’ finishing is glaringly obvious, but Himself said it looks ok, so I shall have to trust him on this one. I did make the double fold bias neck ties from the same fabric and they look fab. I should have made more really … Bias really isn’t hard to make, just time consuming. IMG_3726.jpeg

I do need more lightweight tops and this is an easy pattern to sew. I will not make it from quilting cotton next time, as that’s more of a spring and fall fabric here, and a pig to sew!

Do read along and see what everyone else has been up to, and check the Winter Wear Designs website for sale items.  

Don’t miss any of the inspiration in our summer tour:
6/24
Livia of Liviality
Patricia of Sew Far North

6/25

Diane of Sewing With D

Suzanne of Winter Wear Designs
6/26
Suzanne of Winter Wear Designs
6/27
6/28
Josianne of Sewista Fashion
Florence guest posting at Winter Wear Designs
Kristen guest posting at Winter Wear Designs